Regrouting Your Tile: The Nitty Gritty
So, the time has come to regrout your tile. It may be completely new to you, or it might have been such a long time since you last grouted anything that you have forgotten about all the nitty gritty details. In either case, this blog post is sure to help. When regrouting your tile, there are a few major steps that you need to be acquainted with. The old grout removal, preparation, installation, haze removal, and sealing are all important steps to consider when planning a grouting job. We’ll go over the nitty gritty of these steps so you can be prepared enough to do it on your own.Removing the old grout
Since this is a regrouting job, you will first need to get rid of the old stuff you are replacing. You can get it out by using a grout saw or, if you have a rotary tool, use its grout removal bit. It is important to be thorough because everything needs to be removed before you can even begin the next part of the job.Preparation
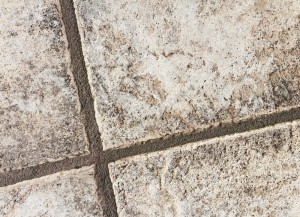
If you are regrouting the tile, there’s a good chance you will want to use the opportunity to get a fresh look. In this case, that means choosing a new grout color. The color of the grout is more important than you might think. If you want the floor to look more put-together as one floor rather than showing off the individual tiles, you should choose a grout color that is nearly an exact color match with the tiles themselves. This can also help mask any mistakes or imperfections that exist in the flooring, such as lines that aren’t totally straight. If the tiles are particularly nice to look at, and you want each one to stand out, choose a grout color that contrasts with the tile color. Additionally, darker grout colors are better for areas that get a lot of foot traffic, as they are much easier to keep looking relatively clean. White or lighter colored grout, on the other hand, is much harder to keep looking clean.Installing the grout
Simply mix the dry grout mix with water. Make sure it isn’t too liquidy and is thick enough to be spreadable. Then pour some out in one spot on your floor, and spread it back and forth over the tiles with a sponge float or squeegee. Make sure the spaces between tiles are completely filled in without forcing it.Removing grout haze
The grout haze, or the remaining grout that is on the tiles themselves, needs to be cleaned off once the grout is firm but not hardened yet. Water and a sponge should do the trick. Don’t be surprised by how long it takes. Rinse the sponge often to avoid spreading more grout on the other tiles. Sealing the grout Once the grout is hardened, you can use a silicone sealer to make your life easier in the long run. It will keep mold at bay, and will reduce the amount of maintenance you will have to perform on your grout, so it is well worth it. Simply use a small paintbrush to paint the sealer onto the grout, but make sure not to get any on the tiles.Subscribe to Genie Bath Systems's Blog


Comments